
Drawing Plastic
Reflection on Plastic
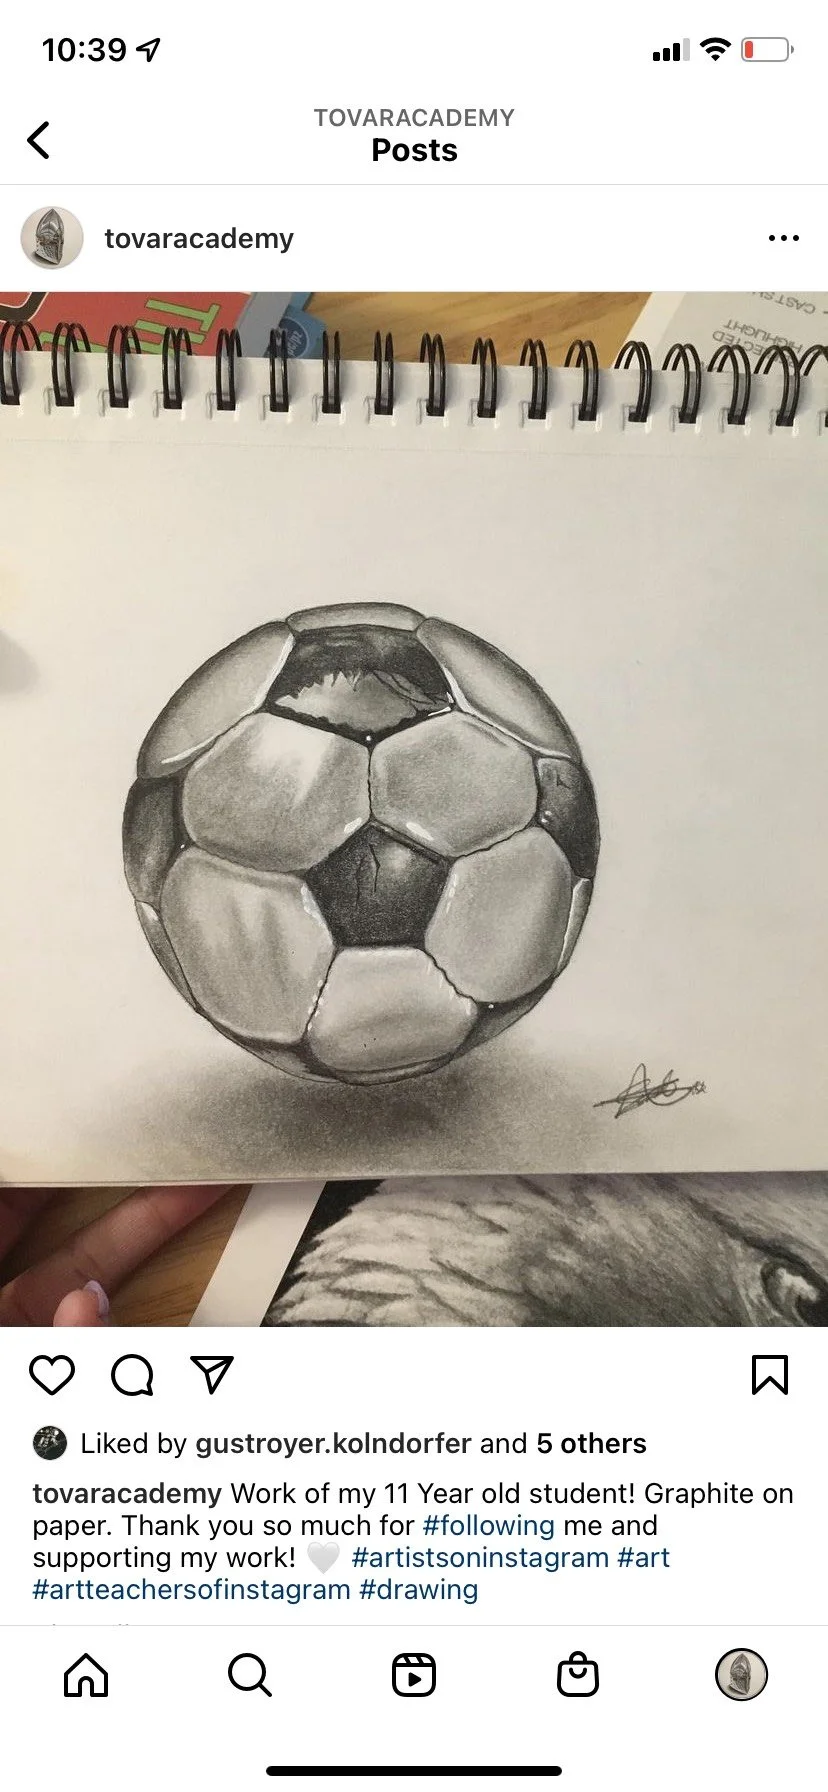
My Student Sandy drew this Football last year and it is one of my favorite drawings she has ever made. Even though she makes more complex drawings now, this one is her first truly realistic drawing and it marked a point in her journey. Good Job Sandy!
Reflective objects like plastic and metals allow us to see what is in front of the object in certain lights and also depending on how clean the object might be. This exercise will help you draw a reflective object, I’ll leave a couple bellow for you to choose but you can use any other one that you like from Pinterest or google.

This step by step is written because I would like to see what you can do with your memory of what we have done in class as oppose to watching a very detailed video. Can’t wait to see what you draw!
Step 1: Sketch the objects outline.
Step 2: work on the medium tones with your 2B pencil.
Step 3: Dark tone where there is shade of light with a 6B.
Step 4: Light tone where there is shine of light with an HB.
Step 5: Blend where you need to.
Step 6: Check where you need extra highlights and make them with the gum eraser.
Step 7: Make tones lighter and darker if you need to. Remember that our hands take some of the graphite off and it makes the drawing lighter and messy. Once you make those dark again, double check that your highlights are still clean, if not do them again.
Step 8: At this point, pay close attention to the details.
Step 9: Detail highlights. With reflection on objects we are able to see what is in front of the object we are drawing, for example when drawing sunglasses we might be able to see a little of what the person is seing. Draw simple lines that resemble the projected enviroment.
Step 10: Continue such techniques. Remember the words of Leonardo Da Vinci, “A piece of Artwork is never finished, only abandoned” For realism, there is always something that we could fix. look for a while longer and correct as much as you can.
Now you have a masterpiece!